


Capture the Seasons: Winter
Tips and tricks on how to style and photograph winter food

Welcome back to the Photography section of this newsletter! Today we are starting a new series that I have been planning out for a while and I am very happy to delve into today!
After talking about some photography fundamentals, we will now be going through each season understanding how to best capture their nuances. Starting with winter, as we still have some cold weeks ahead…
Catch up with some basic notions here first:


All the images below have been taken by me (styled, shot and edited) with my Sony camera unless stated otherwise.
Winter’s Cozy Charm in Photography
The colder temperatures of winter naturally call for rich, hearty dishes and comforting baked goods. Days are shorter and the light softer, which imprints a certain mood to the photographs. Even if you are not in a snowy area and don’t have a crackling fire going, you can also take photos that have a comforting feel. With the right techniques for capturing the season's warmth and styling your dishes, you can turn simple meals into inviting and heartwarming images.
Here I will show you how to best photograph the essence of comfort, with an emphasis on warmth, textures and the soft beauty of winter light.

How to Style your Winter Food Scenes
Textures & Layers
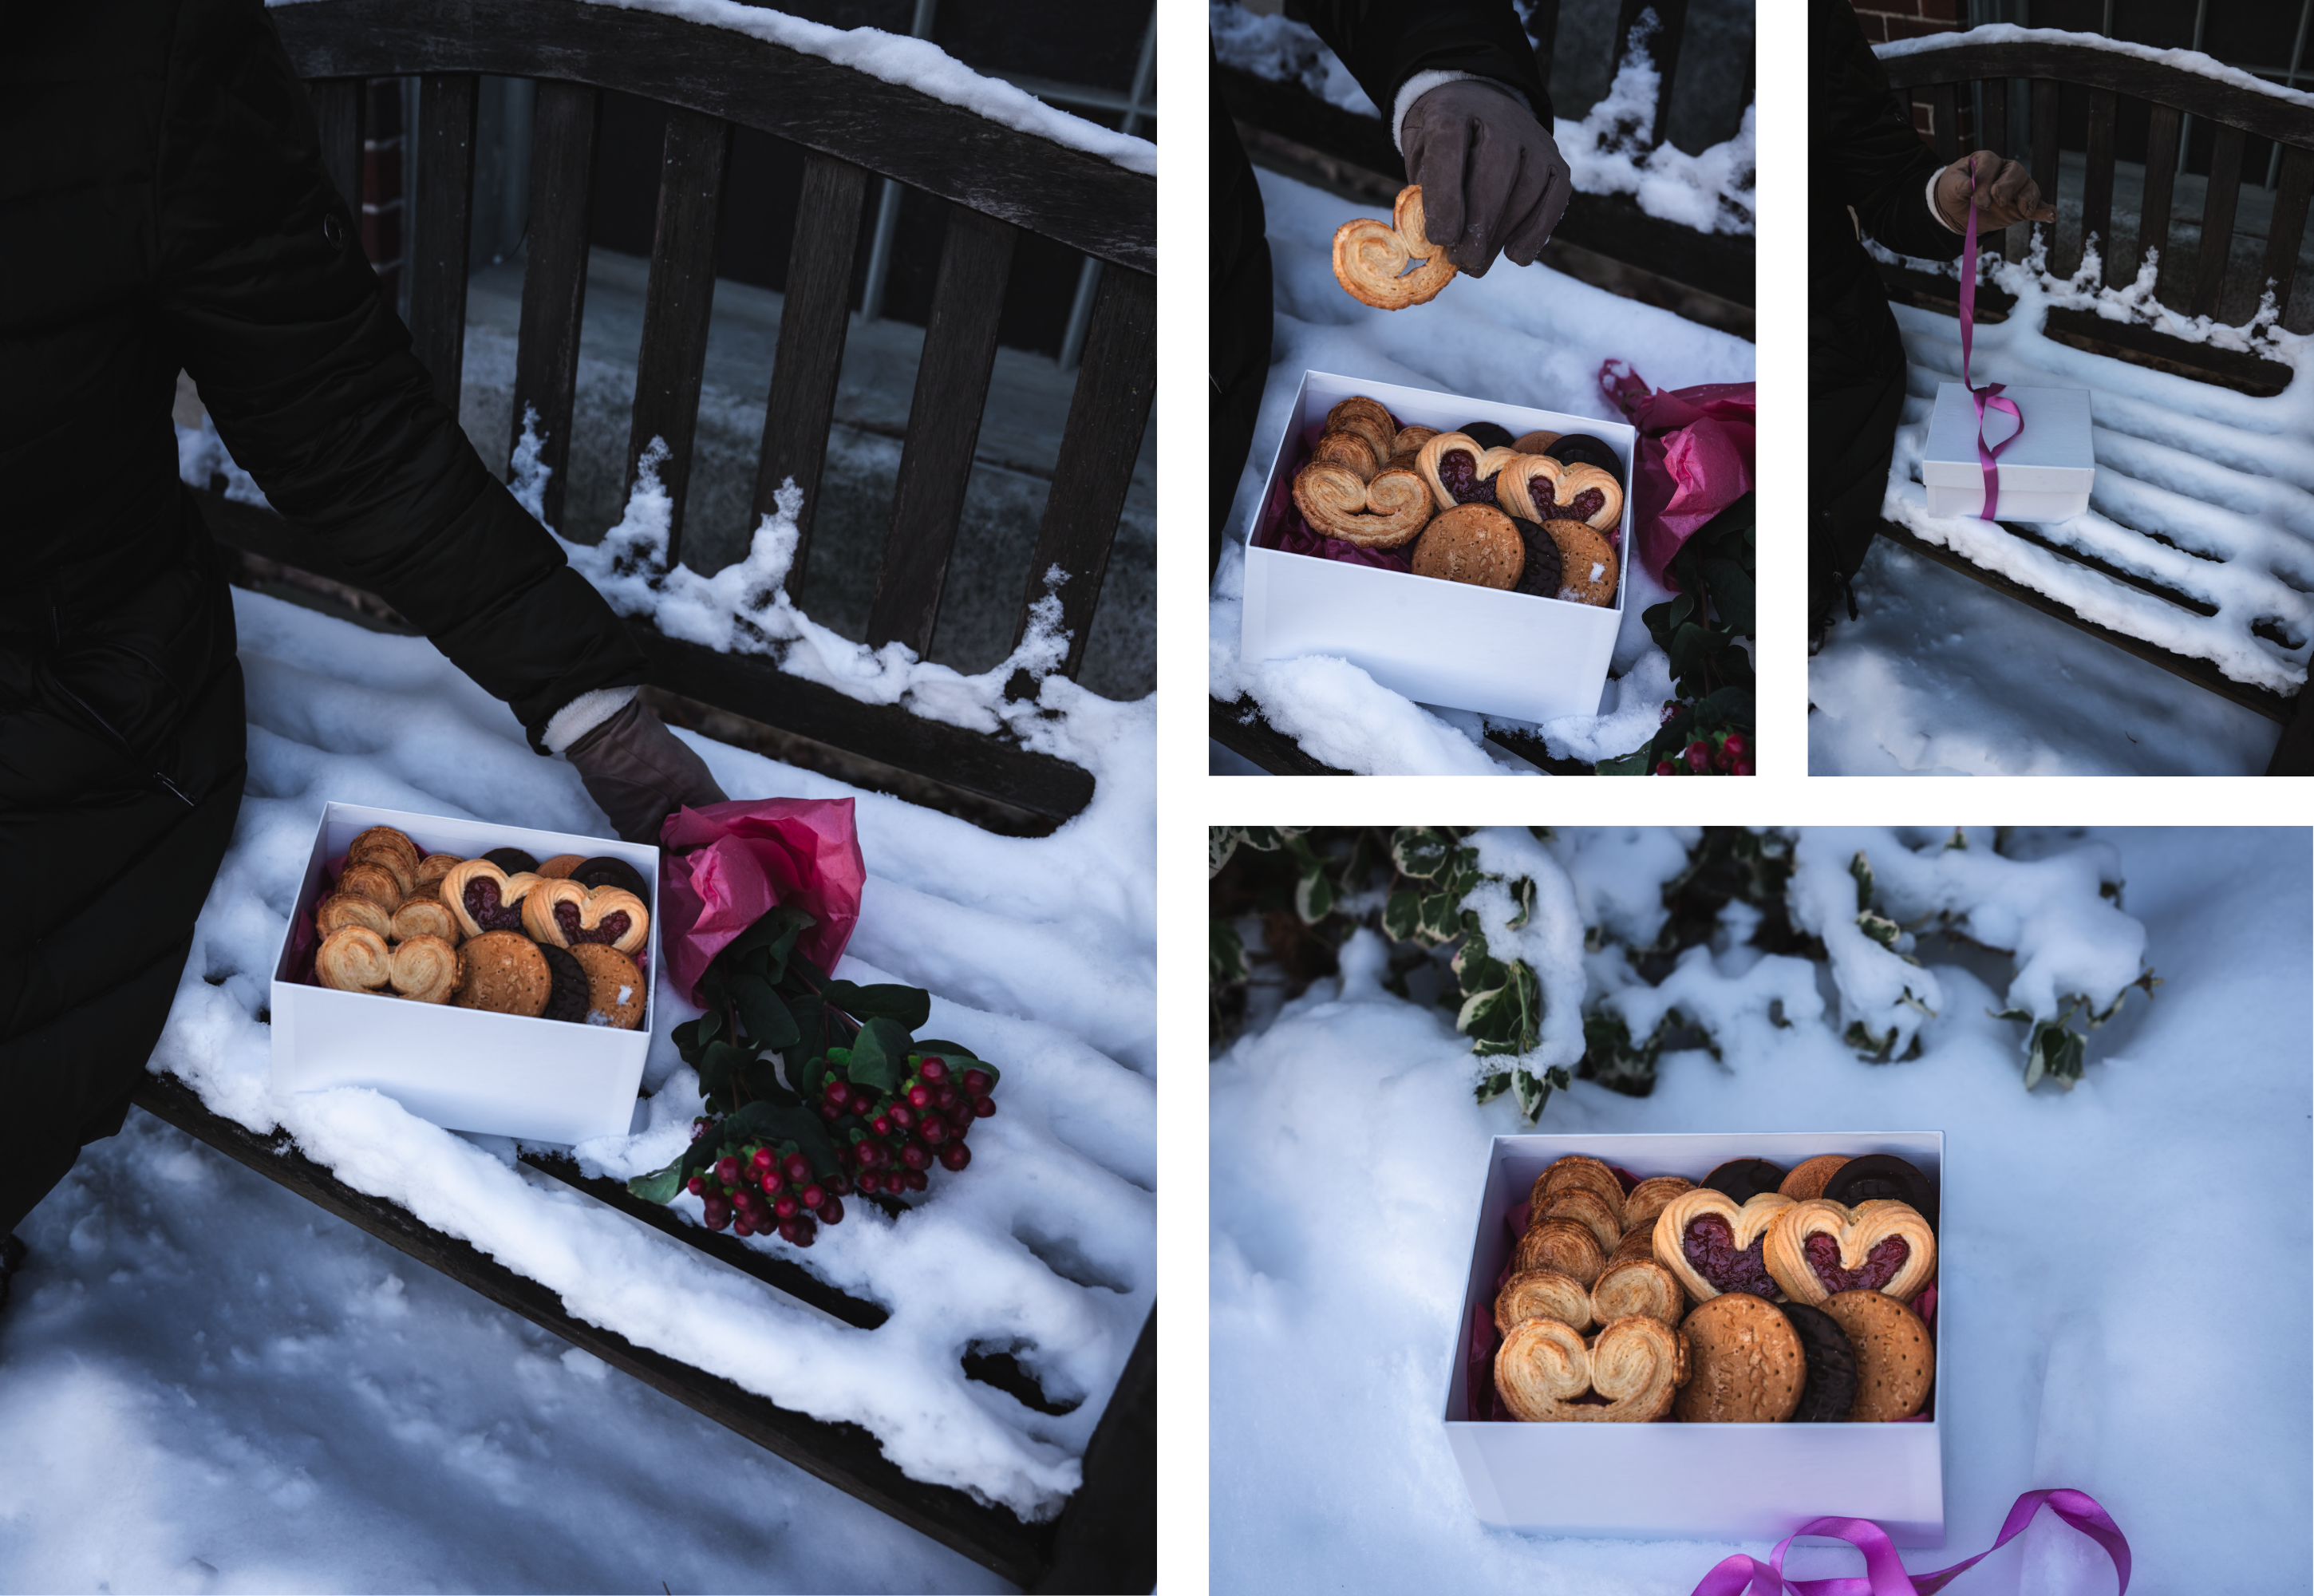
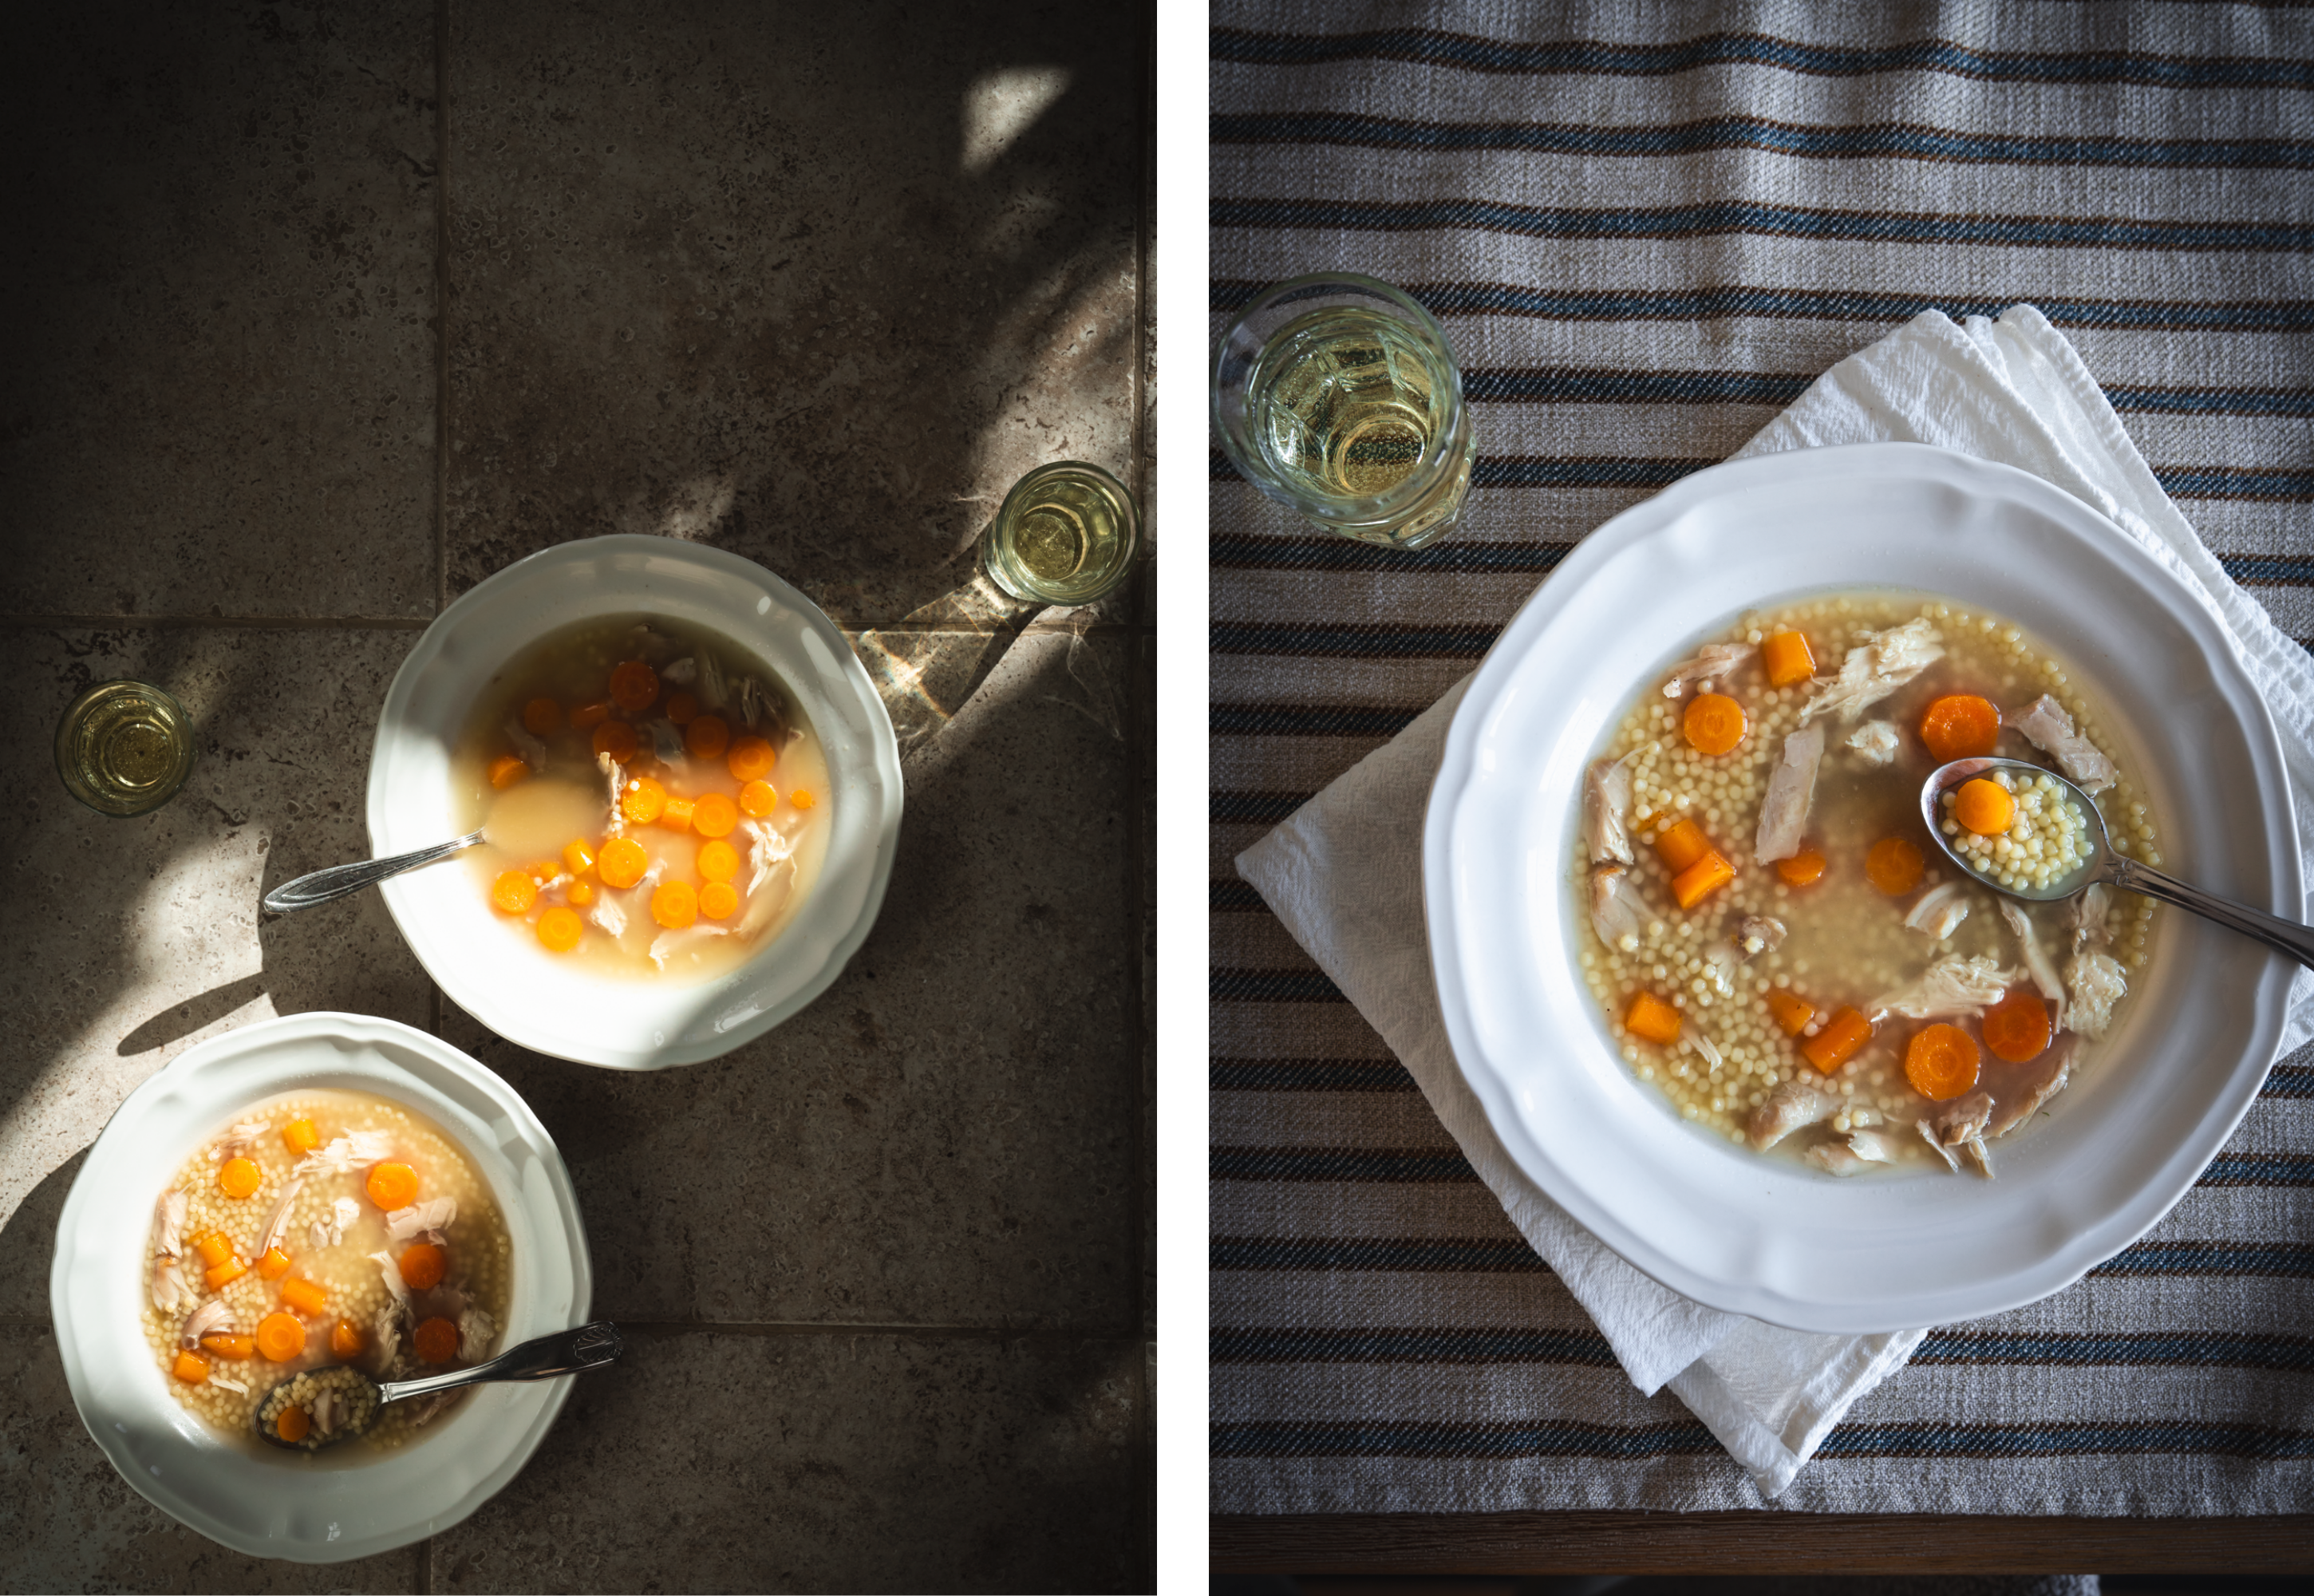
When it comes to styling winter food, the key is to embrace the textures and warmth of the season. Think creamy soups, crispy crusts, and fluffy breads. For stews and soups, focus on the rich colors and chunky textures—root vegetables, tender meats, and savory broths. Use simple, natural materials like wooden cutting boards, stoneware bowls, and linen napkins to complement the hearty feel of your dishes.
For baked goods, think about their highlights and capture that—cracked crusts, golden edges, and soft, pillowy insides. Place your bread on a worn wooden surface, or shoot it in the act of being sliced to show off its airy interior. You can also add touches like a dusting of flour on the table, a scattering of herbs, or a spoonful of honey dripping from the edge of a jar.

Seasonal Touches
Incorporating seasonal ingredients is an obvious and great way to refer to the season. Focus on the underrated beauty of root vegetables, winter fruits and spices. They can be the ingredients of your dish or a prop to make your meal more seasonal. Fresh rosemary, thyme, or bay leaves can add a pop of green to stews and soups, while citrus slices or cinnamon sticks bring color and fragrance to baked goods.

Use of Props
Adding textured materials (like a cozy wool blanket, a thick sweater or a knitted dishcloth) can make your scene feel even more inviting and be a contrast to the fright temperatures outside.
Make sure you are wearing the right clothes before putting yourself (your hand and arms, for example) in front of the camera. You may be warm enough at home or even hot if moving around between the kitchen and the styling area, but a bare arm or a thin t-shirt is not going to read great next to your hot soup.

How to Overcome Low Light & Harsh Shadows
Winter presents its own set of challenges when it comes to food photography, especially with shorter days and lower light levels. The dimmer natural light can leave photos feeling flat or too dark, and the long shadows caused by the low angle of the sun can be harsh on your dishes. But with a few simple tricks, you can make the most of the winter light and still get stunning, cozy shots.
Low light
One of the best ways to tackle low light is to embrace it, rather than fight against it. Shooting on cloudy days or in the late afternoon can actually give your photos a soft, dreamy quality. You should always position your dish near a window where the light can flow in from the side. If the light is still too dim, you can use a reflector to bounce light back onto the food. A simple piece of white foam board or a light-colored surface placed opposite your light source will help brighten up shadows and add a gentle glow to your dish. If you feel the opposite — the dish is looking flat with very weak shadows, use a black board instead to create more contrast.
Hard light
Another issue you might encounter is harsh shadows. The low, angled sunlight in winter can create long, dark shadows that distract from the food. To counteract this, you can diffuse the hard light using sheer curtains or even a white bedsheet hung up near a window. This can create a softbox effect, making the light much more flattering.
Though, if you like the drama of shadows, embrace them!—just make sure they don't obscure important details of the dish.
How to Frame your Food
The way you frame your food can enhance the cozy, rustic feel you’re going for or miss the point. Think about what’s the highlight of your dish before deciding where to position your camera (or phone) in respect of the subject. Experiment with different angles to find its most flattering view.
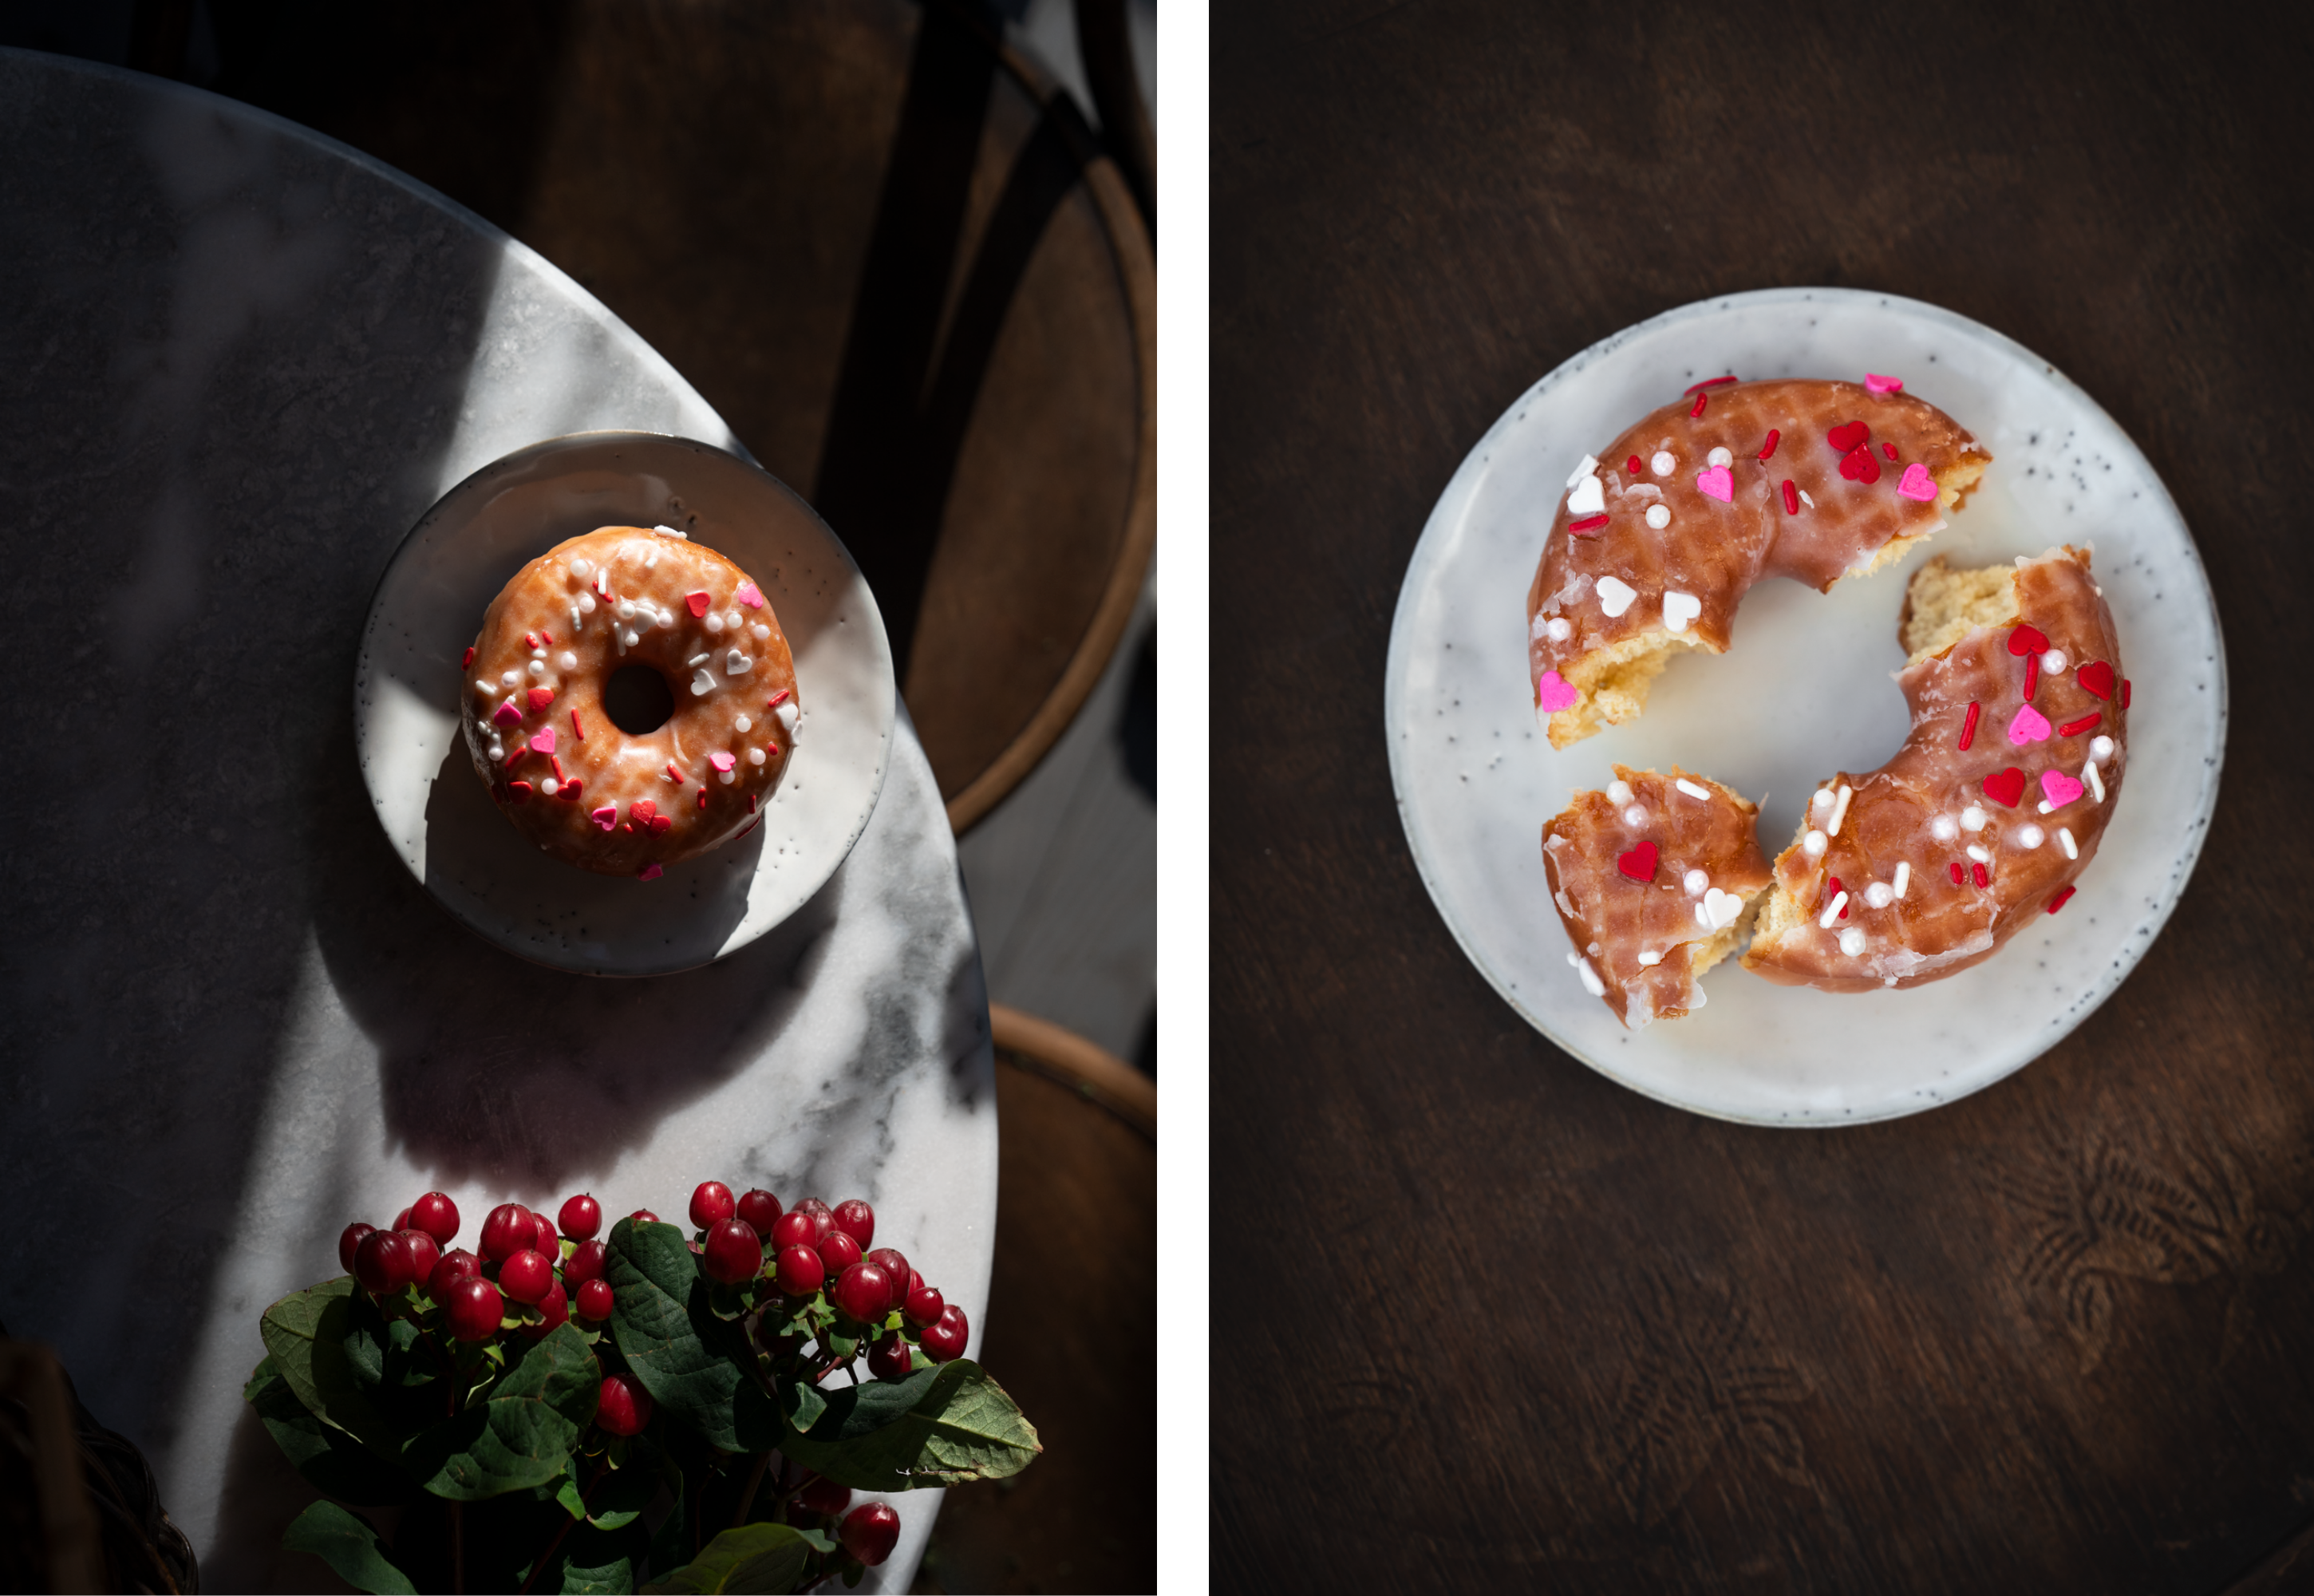
Overhead Shots
Overhead shots are perfect to capture dishes that are best seen flat, like a soup or a stew. The dish can then be emphasised with layers of ingredients or garnishes to show some texture. This angle also works great with flat cookies and larger scenes.
Close-ups
For a more intimate feel, experiment with close-up shots. Focus on the details—like the steam rising from a bowl of stew or the crumbly texture of a freshly baked loaf. Get in close to highlight the golden crust of bread or the delicate layers of pastry. Close-ups will highlight the most beautiful part of your dish, so make sure it is indeed beautiful!
Layer your composition
If you want to add more depth to your photos, consider layering your composition. Place props like a rustic spoon or a tea cup in the foreground with some ingredients slightly blurred in the background. You can also experiment with dried plants and flowers like eucalyptus and baby’s breath that will refer to the season. This adds a sense of dimension and makes the viewer feel like they’re about to dig in. Play with the blur, making sure your dish in always in sharp focus.

How to Choose the Right Colors
When it comes to styling winter food, the color palette plays a vital role in setting the mood. The cool, muted tones of winter naturally lend themselves to warm, earthy hues that evoke comfort and coziness. Though sometimes the food we cook in winter can seem too brown and boring. We can dress it up with garnishes and sauces, but there’re some other tricks on how to make it look good with clever styling.
Go neutral
Use neutral or earthy backgrounds to let the food stand out. Dark wooden surfaces, simple stoneware dishes, or even soft linen napkins in muted tones (like greys, warm whites, or browns) will complement your food. These allow the food to shine while adding to the warmth of the scene. The natural materials and subtle tones will evoke a sense of calm.

Go colorful
You can add pops of color through ingredients and bring life to the photo without overwhelming it. But you can also play with colourful backgrounds and props keeping in mind that if they are too bright, they will take the attention from the dish itself. Be mindful of the tones—bright, stark colors may feel out of place during the winter months. Instead, choose subtle and muted tones that complement but not overshadow the dish; and consider contrasting colors (green-red / orange-blue /yellow-purple) to add another layer of interest.

Play with the edit
If you have an editing program you trust, you should try to balance the warm and cool tones in the image. Winter light tends to have a cooler, blueish tint, so you may want to adjust your color temperature (the color tone of the overall image) slightly to warm up the tones, making the food feel even more inviting. I do enjoy the contrast between blue and gold, so normally I tend to edit my winter images on the cooler side and adjust the color temperature only in the food itself. A little editing can go a long way in fine-tuning the overall mood! Let me know if you would be interested in knowing more on how to edit your photos!

Bonus: Adding Steam & Motion
Capturing steam and motion is not easy. You need to have a tripod if you are both the photographer and model and know some technical camera and phone settings to get the perfect shot. But capturing the warmth and movement that come with hot, hearty dishes can bring an extra to your winter recipe and pull the viewer in.
By adding subtle movement to your photos, you bring an added layer of interest, making the viewer feel like they can almost step into the scene and enjoy the meal themselves.
Capturing steam
Capturing steam is all about timing and positioning. To photograph steam rising from a hot dish or drink, make sure your lighting is just right— backlighting is ideal as the steam is illuminated directly from behind, making it more visible. Use a fast shutter speed to freeze the steam in action, or a slightly slower speed to capture a soft blur that suggests warmth. If nothing works but you still want that smokey effect, you can experiment with a candle or incense to enhance the effect if necessary. Place it behind the dish hiding the source and see if it looks natural.

Capturing motion
Another way to add motion is through pouring or stirring. A shot of sauce being drizzled over a dish, hot broth being ladled into a bowl, or a slice of bread being cut open can add dynamic movement to the scene. These types of shots create a sense of anticipation—viewers can almost feel the heat and smell the aromas. Use a slightly faster shutter speed to capture the movement of liquids, but make sure the food itself remains in focus. If you’re pouring something like a sauce or syrup, it’s great if the light hits the liquid in a way that highlights its texture and color.
Try to capture the right moment—perhaps a fork breaking into a melted cheese or a cookie being dipped in hot cocoa. These moments tell a story, inviting the viewer to imagine the joy of enjoying the dish in real life. Don’t be afraid to let a bit of the motion blur—this adds a sense of warmth and energy to the photo.

To wrap it up
To wrap it up, here’s a summary of what we’ve been talking about:
Style your food thinking about cozy textures and layers and show seasonal touches.
Embrace the natural winter light and use reflectors to increase it and diffusers to soften it.
Frame your dish thinking about its highlights.
Go with colors that complement your dish and don’t take its attention away.
Extra tip: Play with capturing steam and motion for a more lived in image.
Have fun experimenting and tag me in your photos so I can see them!
Elisabet these tips are SO helpful! I've had a hard time taking photos during the winter.