


How to Create A Fit-All Home Photography Studio
You don’t need a Pinterest-worthy kitchen to photograph beautiful recipes, I show you how

In March I read an essay that made me write this newsletter today. I have been subscribed to
AnthroDish for a while, but her article titled “cooking in ugly kitchens” took me by surprise. It’s an ode to her brown “ugly kitchen”, which she describes as not aesthetic but very functional and has welcomed beautiful family cooking scenes. In one paragraph Sarah says:“An ugly kitchen is inherently not for a camera, but for the landlord’s pocket. Still, it has felt transformative for me despite its lacking aesthetics. I may get frustrated trying to take a before photo of the cute solid food spread I’ve prepared for my goblin baby, but that doesn’t take the life out of it. It just means that using the kitchen as a supplementary source of income becomes tenuous.”
Aside from the day-to-day functionality of the kitchen, I though “you don’t need a pretty kitchen to take a beautiful photo!”. The truth is, most food photographers don’t necessarily have a pristine space —they create it!
I’ve lived with multiple kitchens, some nicer than others, but they all had their challenges. My first kitchen as an adult was in Bangkok, and the word “kitchen” is very generous —it was mostly a sink an half a meter of tiled countertop. No stove, and obviously no oven. We used it a ton! But the photos I took back then weren’t necessarily in that kitchen.
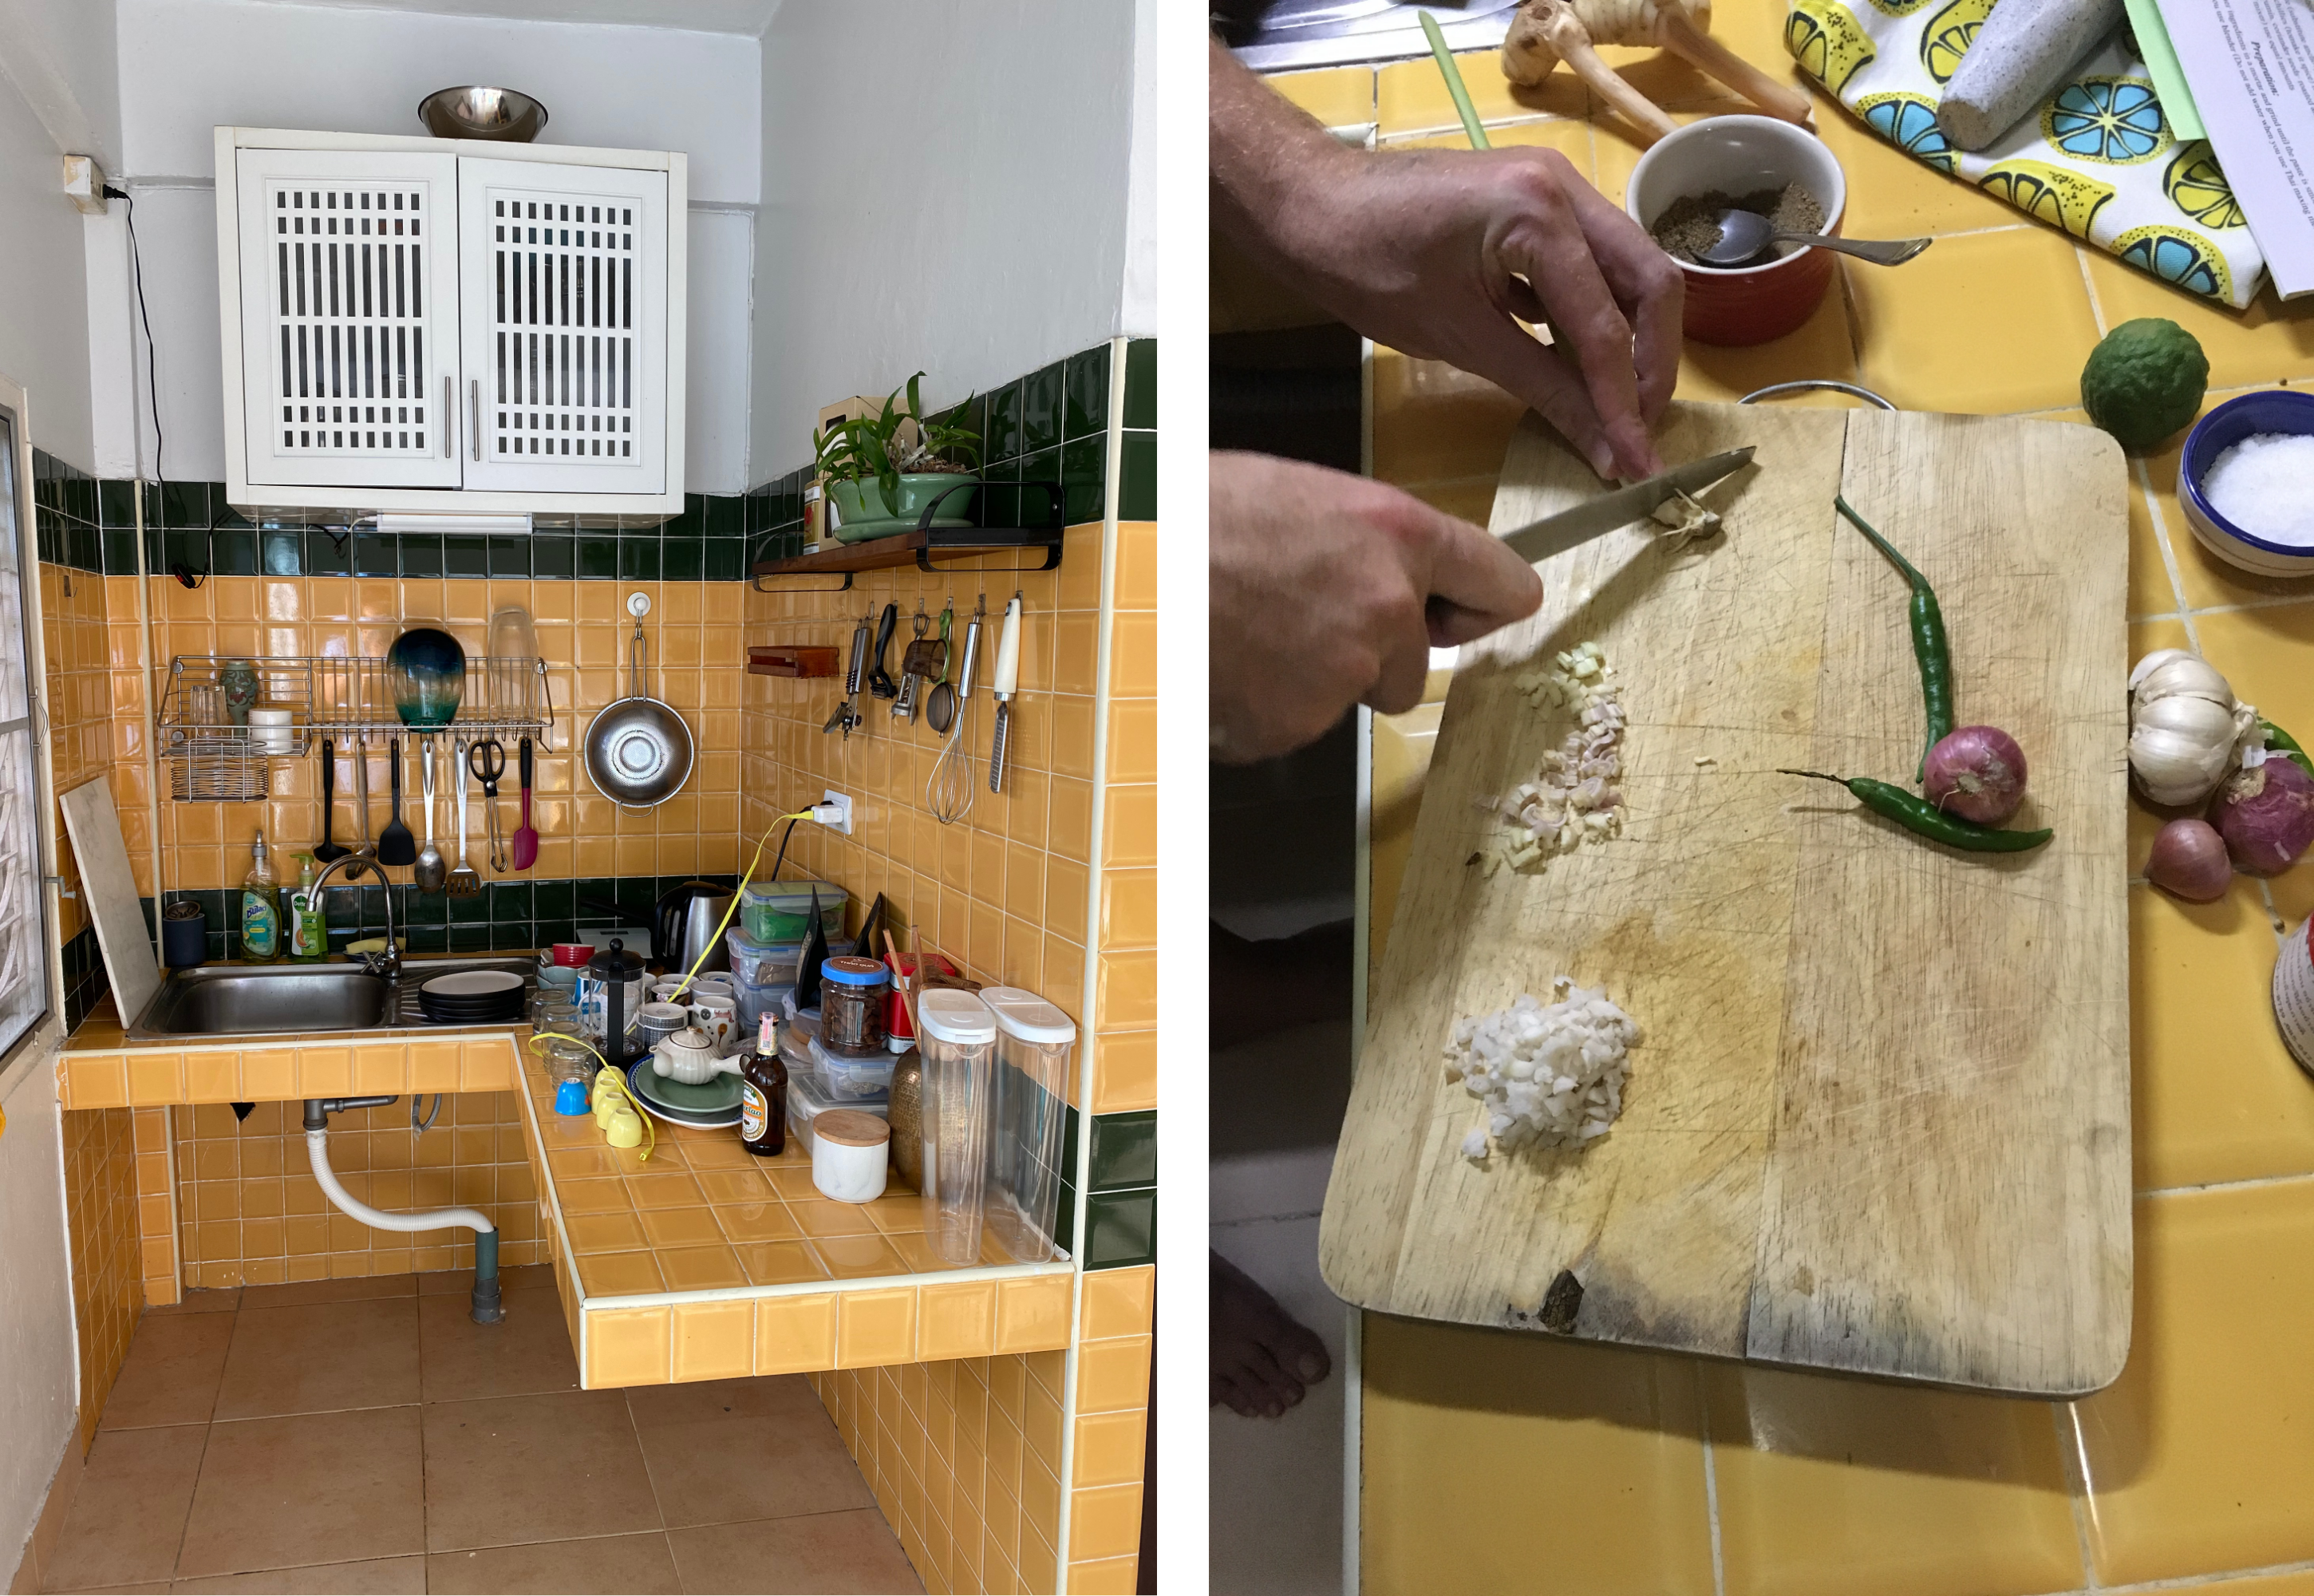
My second kitchen was in Budapest. It was much larger but had a very ugly black-red-silver tiled backsplash that was shiny in all the wrong places. The countertop was a butcher block, but not a nice one —it cast a strong orange tint in every image.

My next-to-last kitchen was in Boston. It was nice to cook in, but not great to take photos. It had almost no natural light, and the countertops were a reflective black granite.

The truth is, kitchens are not necessarily designed with food photography in mind. They‘re made to be practical. You could have a wonderful kitchen — insert your own definition of wonderful here— and still struggle to take good photos. The countertops might be too reflective, too white, too dark, not have enough light, etc.
That’s why I am going to show you how to create an on-and-off photography studio space where you can control every aspect of your image —and help make the “supplementary source of income” feel a little less “tenuous”.
Choose your spot
The first thing to do is choose where you'll have your set-up. Don’t worry if you think it might block a passageway or take up too much room — it won’t be permanent.
What to look for:
Close to the kitchen or not too far from it, for practical reasons.
Next to a natural light source —a window.
Spacious enough for you to move around it and place a small surface (more on that below).
In all my previous homes, the kitchen was right next to the dining room, in an open or semi-open layout. The dining room usually had large windows, so I would set up my temporary space beside them, using the dining table to prep the dish. But I’ve also photographed a cake on a stool in a bedroom — and even outside on my balcony!
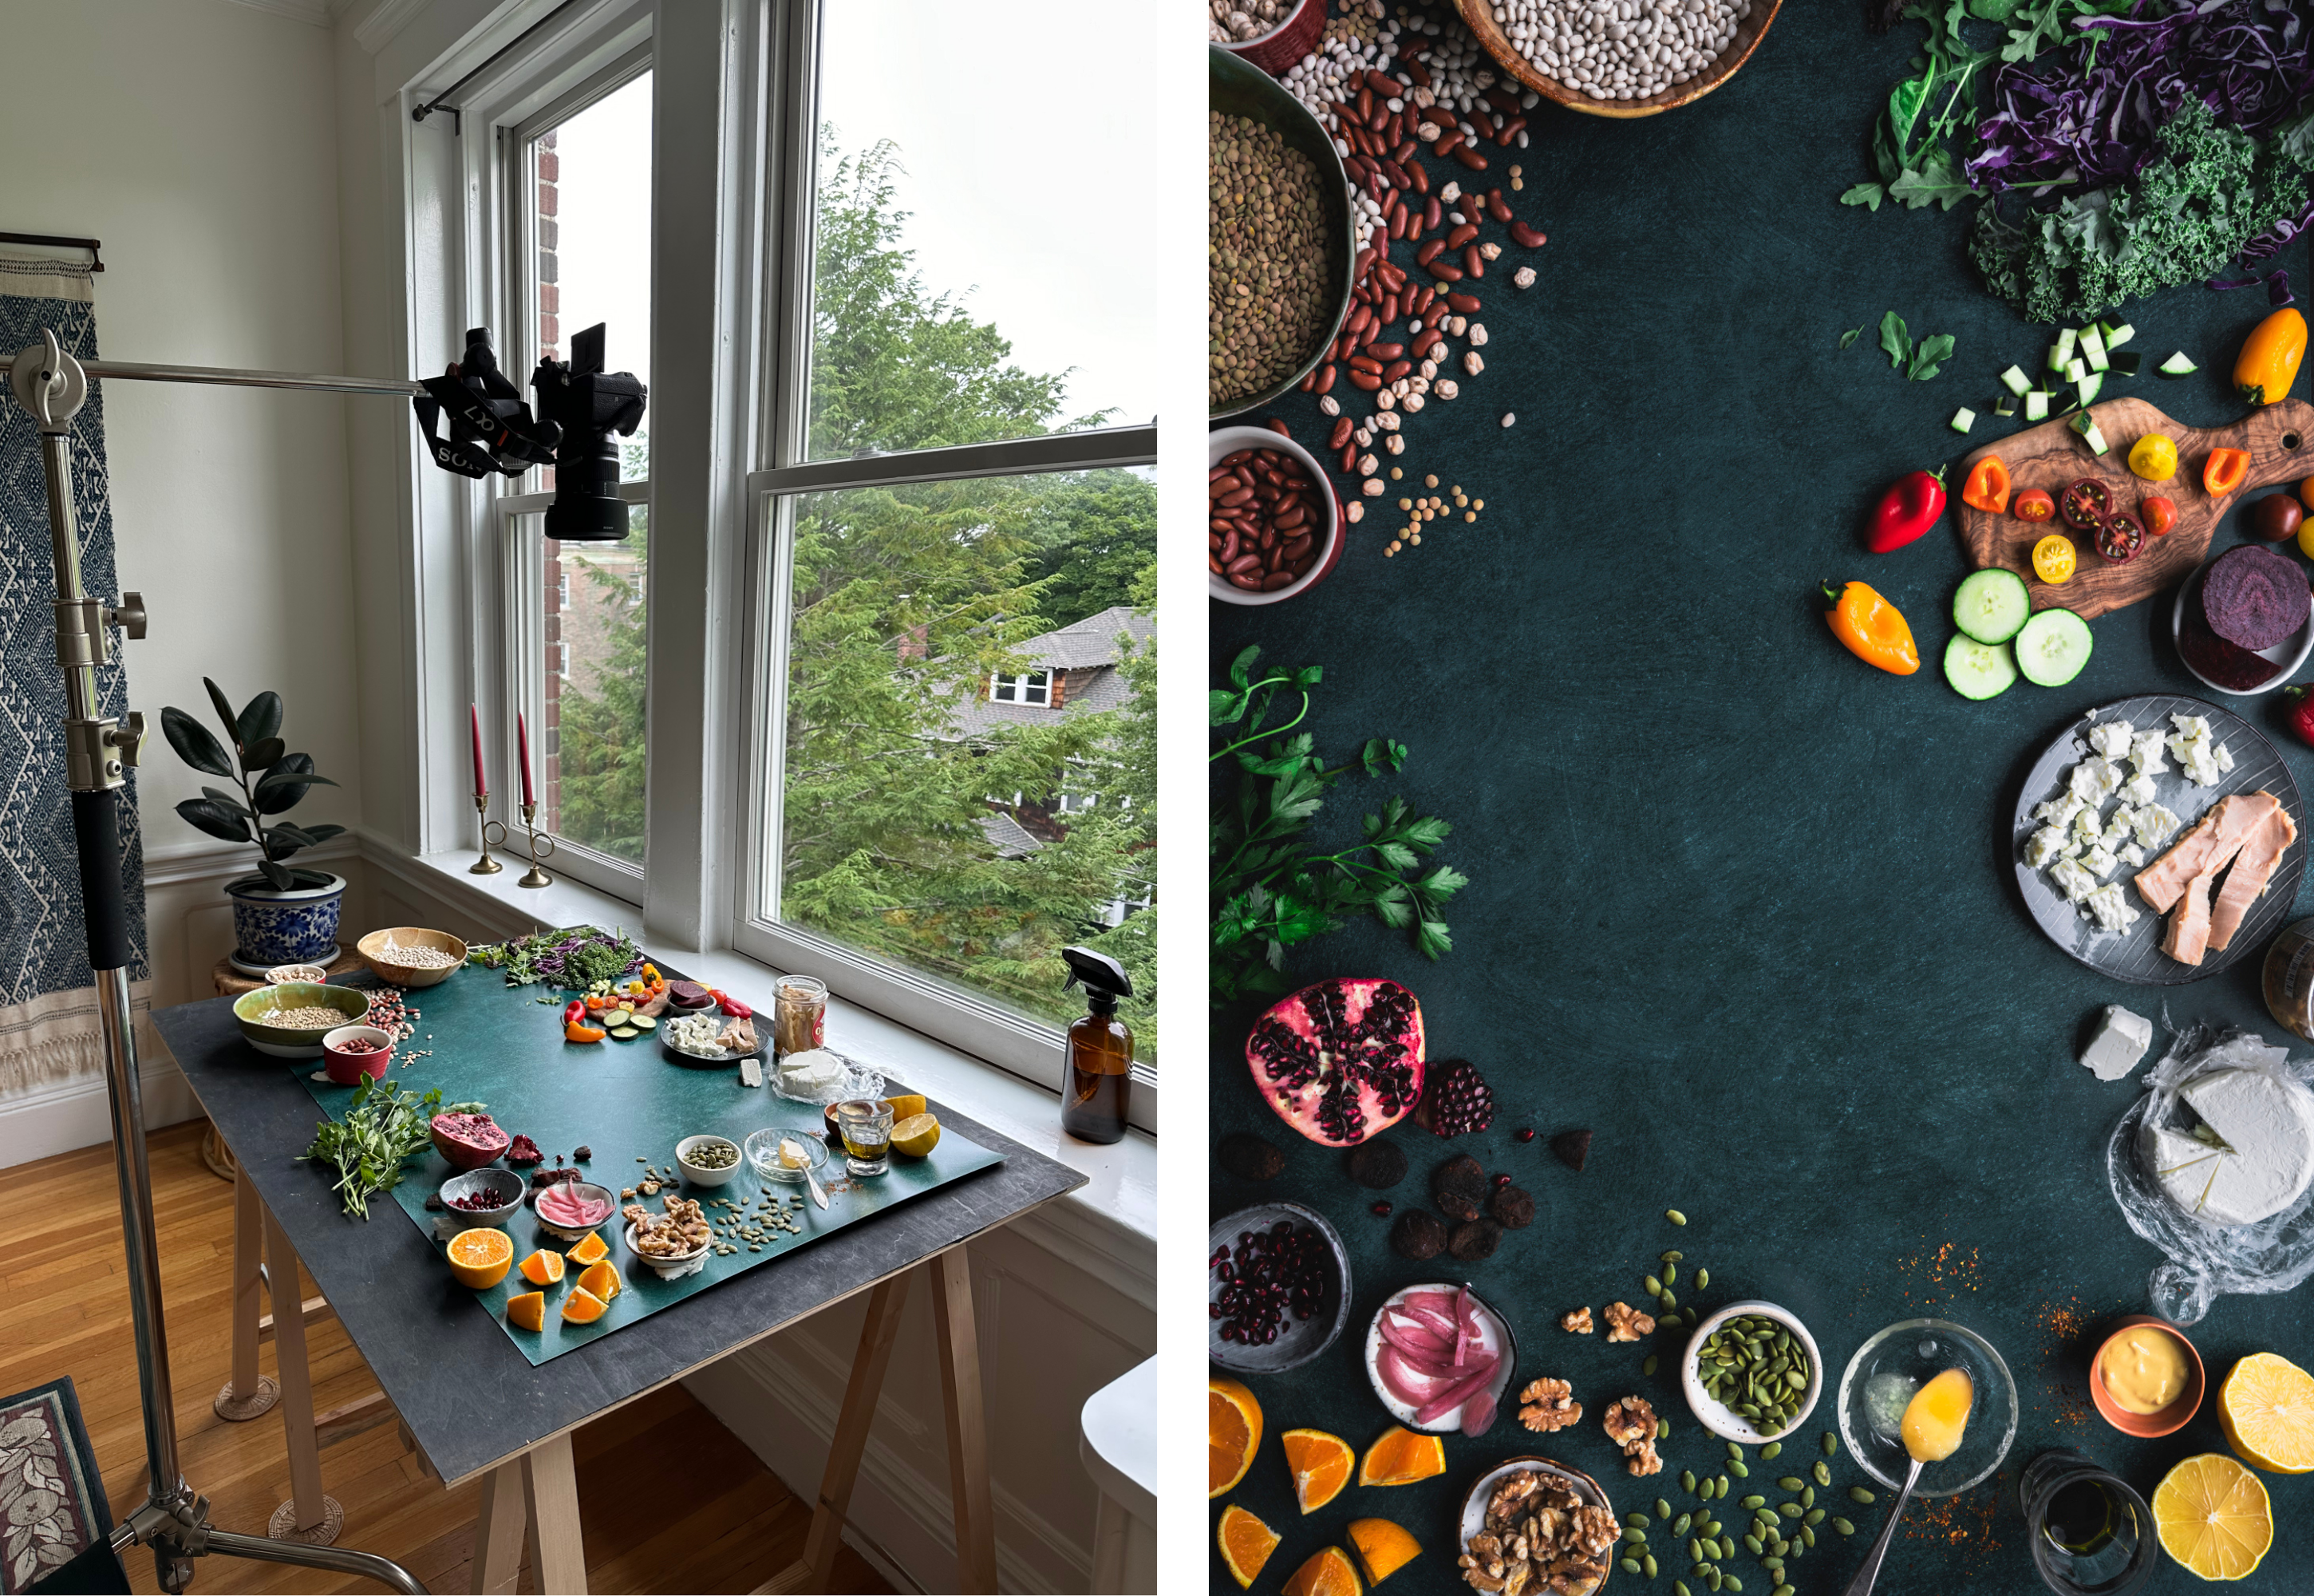
The idea is to find a space that’s accessible enough for regular use and big enough to let you move freely with your plates and your phone or camera.
Find your new surface
If your kitchen countertops don’t work for photography, you’ll need to find new surfaces to shoot on. This actually opens up a world of possibilities — it means you’re no longer tied to a fixed element!
If you have enough space, I recommend getting a pair of trestles and a sheet of plywood. You can find this at most hardware stores. Ikea also offers a set, though I find their tabletops a bit large — my surface measures 30x40 in — they offer the flexibility to raise the height to counter level or lower it to table height.
The great thing about using plywood is that it gives you a new blank tabletop. You can experiment with plate settings or even photograph yourself in action — especially if you use a tripod. You could also paint it to create a personalized background. I’ve done this with two of mine — let me know in the comments if you’d like a tutorial!
The plywood also acts as a stable surface where you can place additional backdrops if you want to switch up the look. You can layer linens, or get creative with a professional vinyl backdrop (more on that below).

Even though the trestles and plywood can be packed away and only set up when needed, I understand they might feel like a hassle. They’re not super lightweight, and they do take up some space. If that’s the case for you, don’t worry — there are other options.
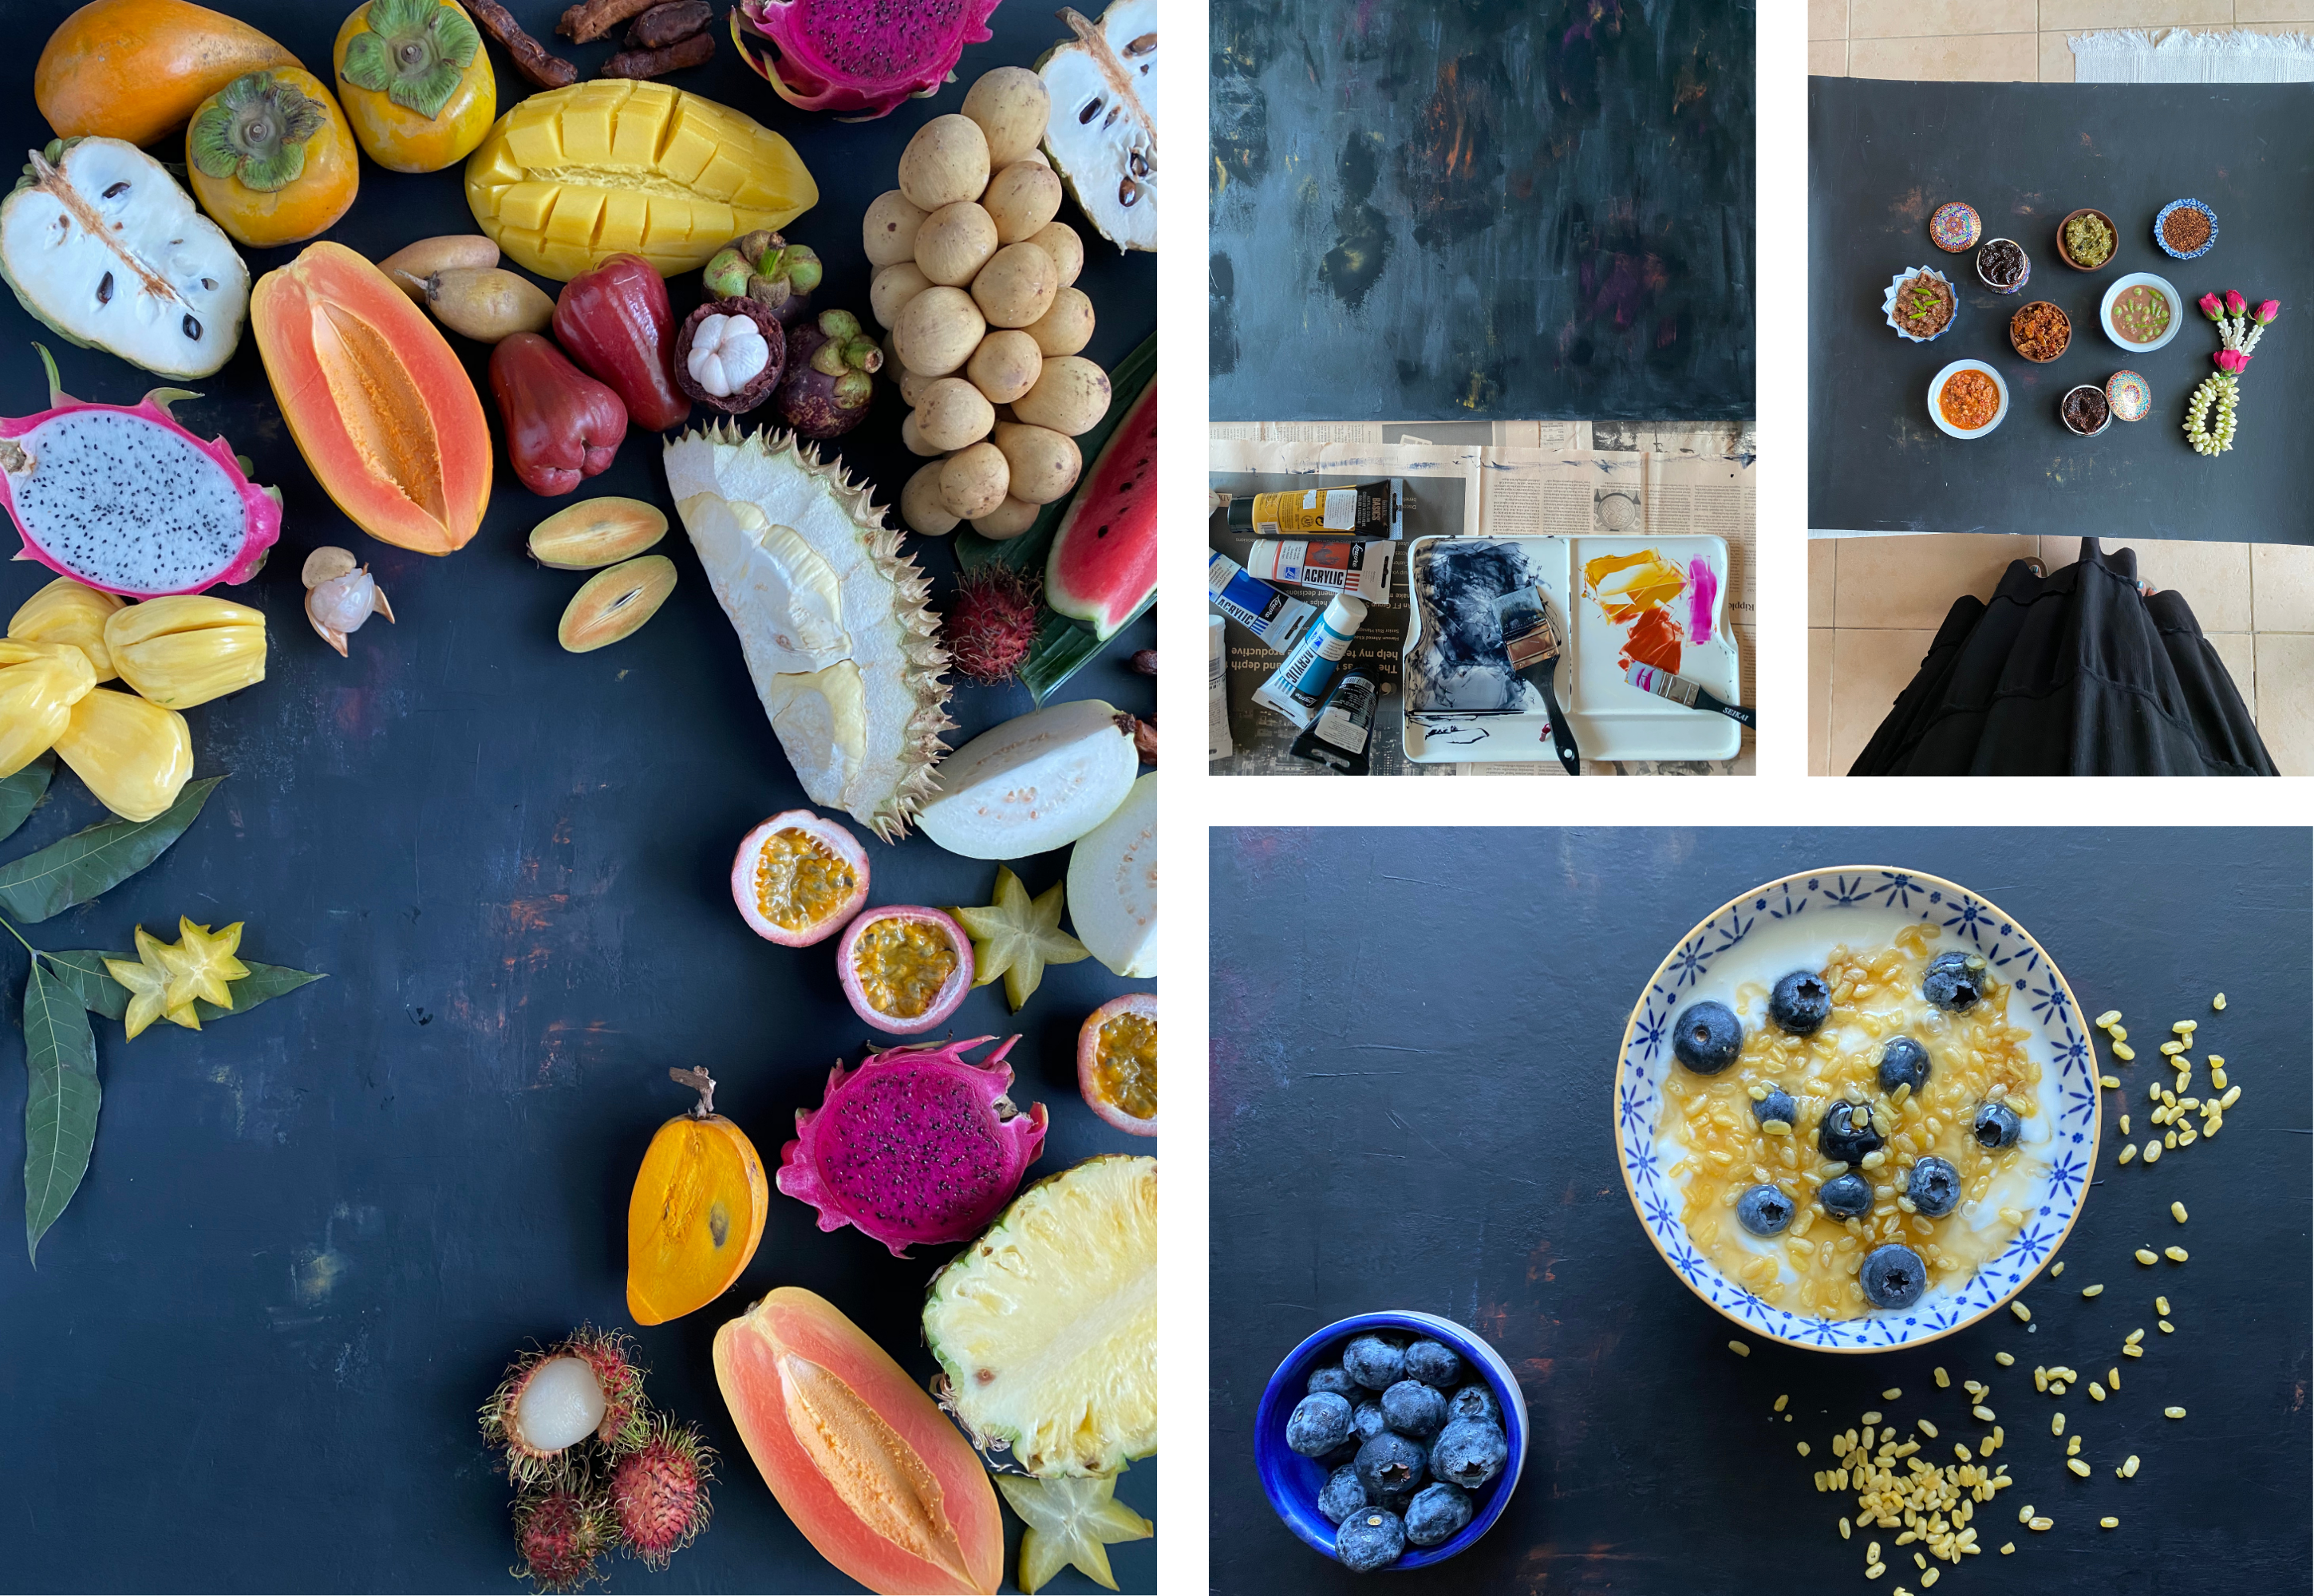
You can still create your setup next to a window, directly on the floor. At the end of the day, it’s a solid surface — and if you're photographing flatlays (see my post about angles here for context), it’s just as good as a tabletop. It might even be more convenient, since you can simply position your camera or phone above the dish to shoot.

If you don’t have room for a 30x40in surface but could manage something smaller, try using a side table. Facebook Marketplace, flea markets, and thrift shops often have affordable options with just enough patina to make your photos more visually interesting. Plus, plates are usually quite small, so you don’t need a huge area!
In fact, if you’re just shooting a single dish and don’t want to set up anything larger, a wooden tray, a stone slab, a platter — even an oven tray — could do the job!
What to look for:
A pair of trestles and a plywood sheet for a temporary tabletop.
A small side table with patina for tabletop-style photos.
The floor right next to the window to create your set-up for flatlays.
A wooden or metal tray, stone slab, or platter for close-ups of your dish.
A chair as a surface for cozy, lived-in shots.
Get creative with the backdrops
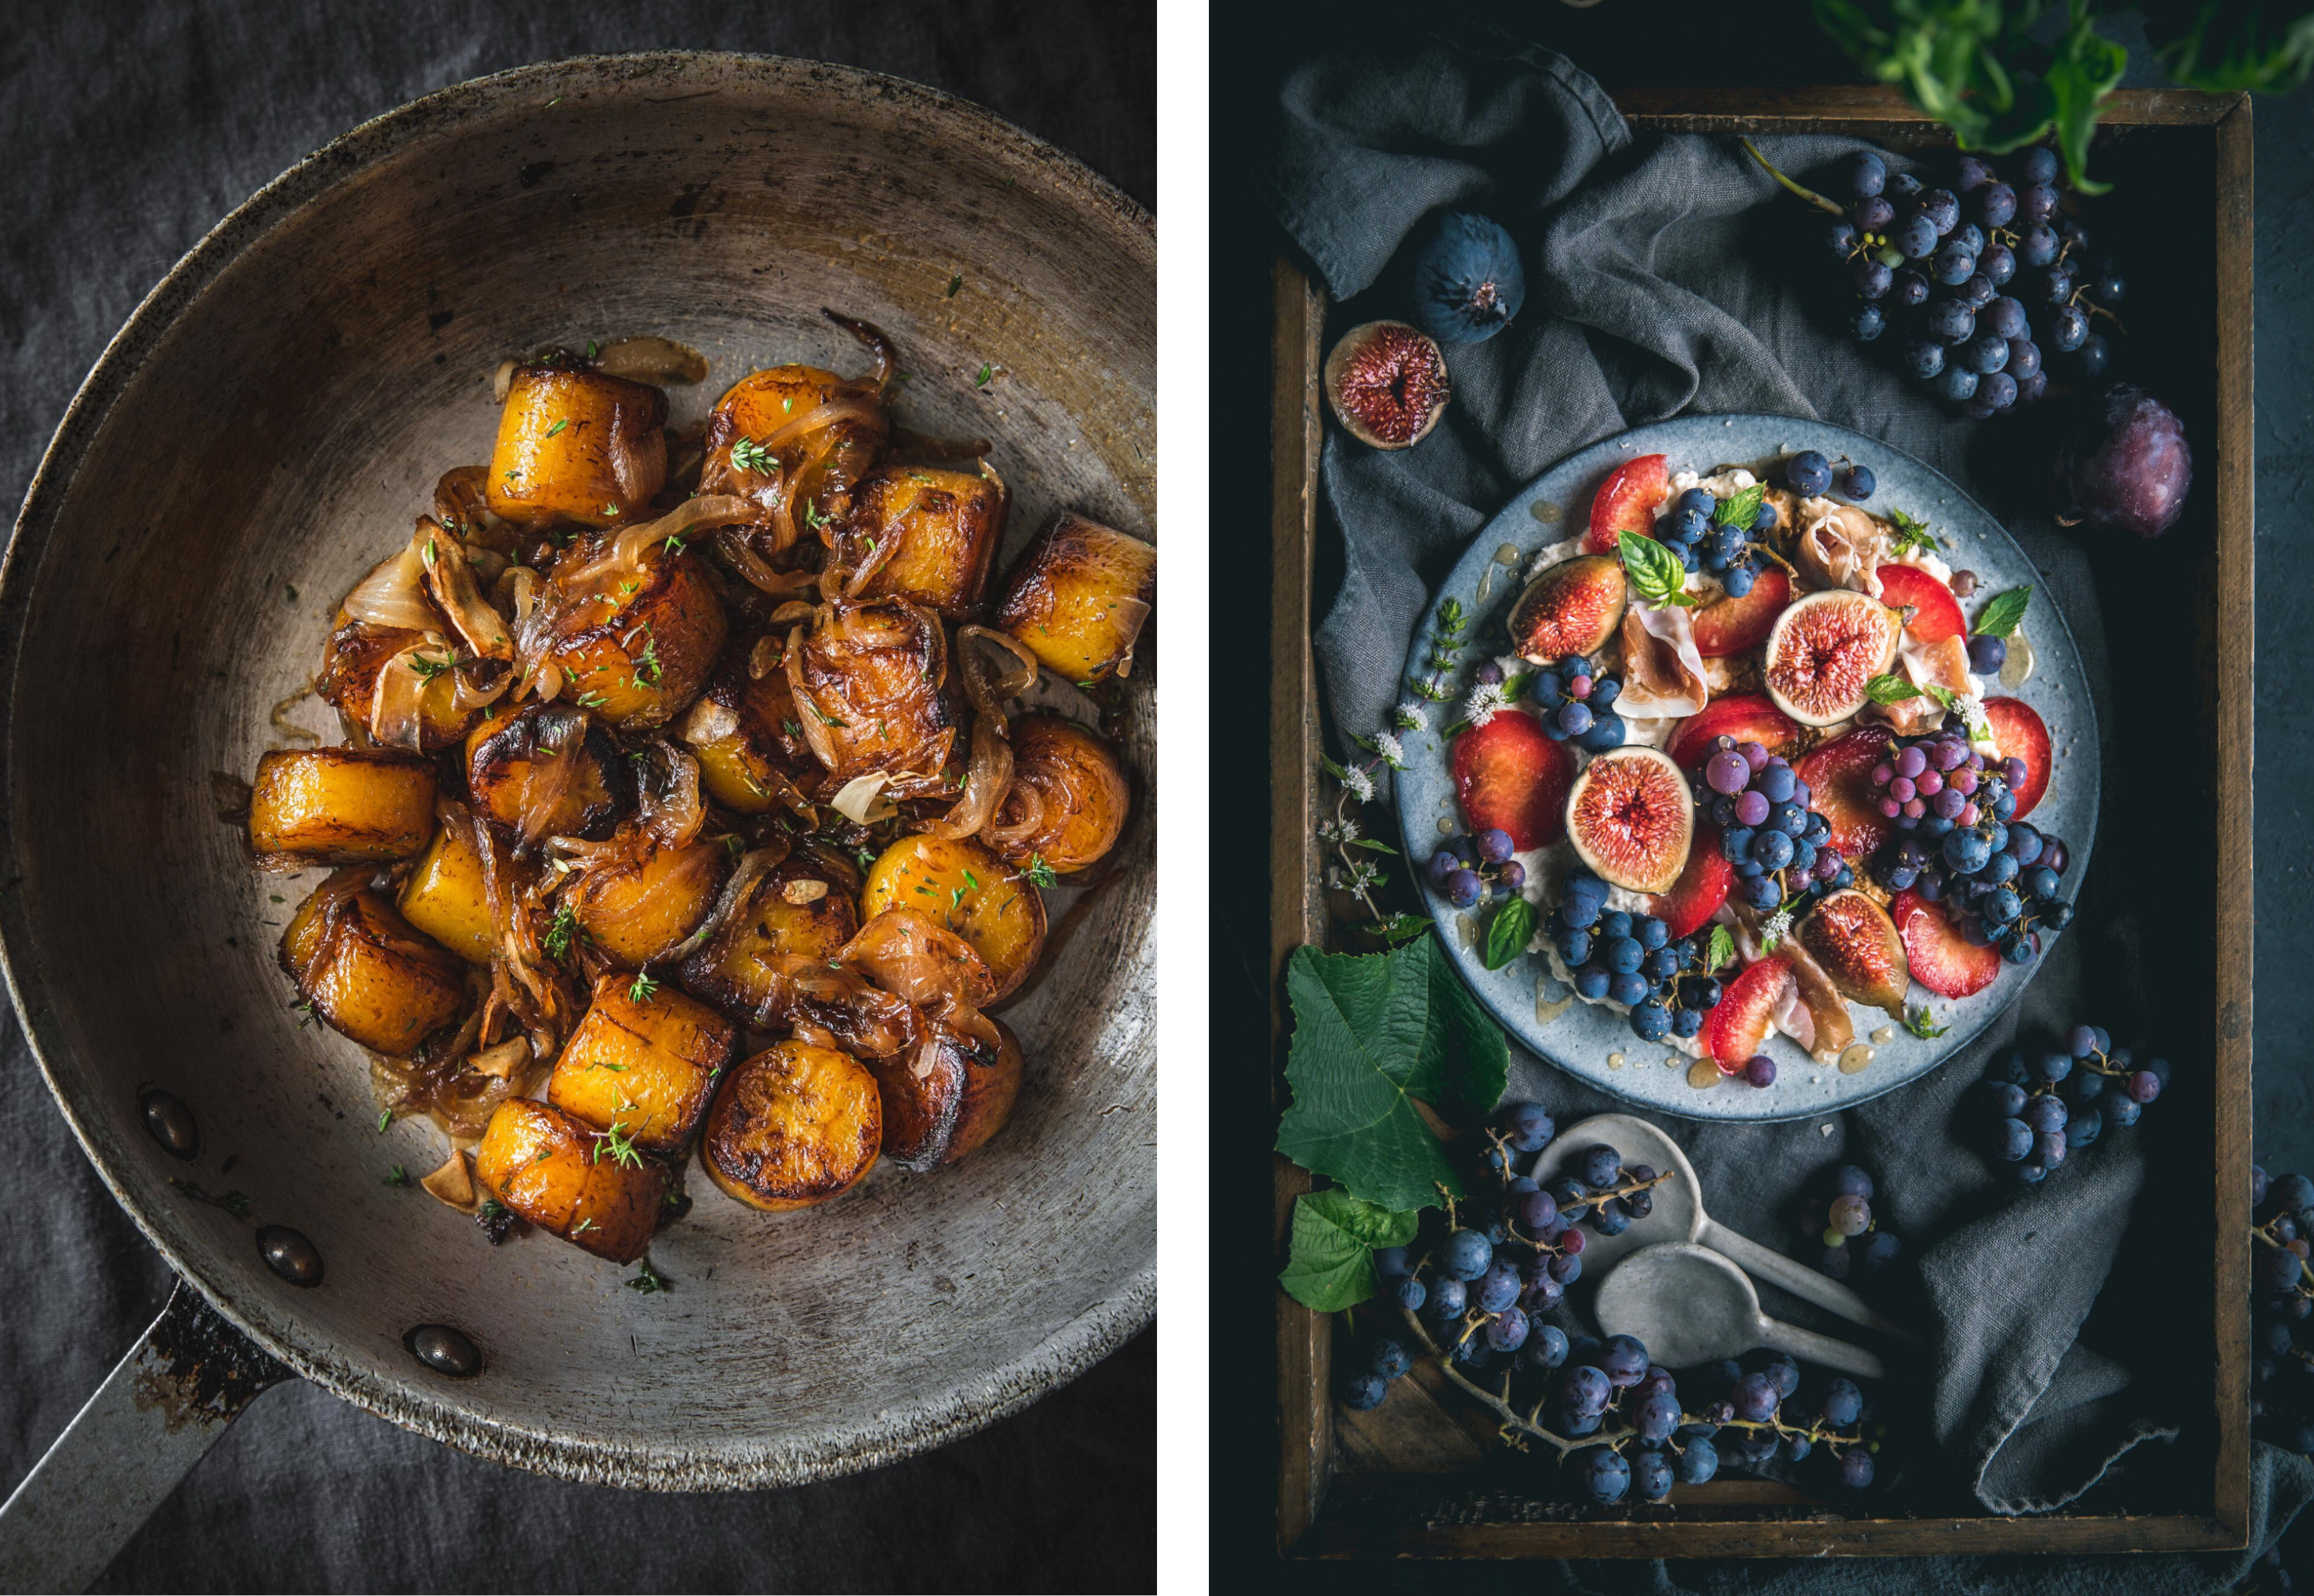
A backdrop is the background of your image. Depending on the angle, it could be the surface your dish sits on, the background behind it — or both. In simple terms: think of the table and the wall.
I’ve already mentioned different surfaces to place your dishes on (plywood, side table, floor), but those don’t have to be visible in your photo if you don’t want them to be. They just need to be solid enough to hold your food safely. For added visual interest, you can place something else on top of them.
What to look for:
Linens: tablecloths, napkins, kitchen towels.
Paper: newspaper, vintage paper clippings, matte-printed cardboard.
Vinyl backdrops: available in different colors and textures
Natural materials: marble slabs, wooden trays, etc.
I wrote a post about my favorite backdrops, where I explain the differences between materials and list my go-to brands. Professional-quality vinyls are an excellent option because they’re rollable, wipeable, and come in a wide range of finishes and colors.
To create a background (the "wall" behind your food), you can stick a vinyl backdrop directly onto a wall — ideally near a window — or lean it against your table using a plywood sheet. There are also stands available that can help support your backdrops (more on that below).

A list of tools to complete your home set-up
I don’t think you need a huge investment to take a beautiful photograph. Photography can get very expensive — believe me, I know— but with just a phone and a few napkins on the floor, you can create something stunning.
That said, there are a few tools that can expand your creative possibilities and make your life easier. If you’re interested in building a fit-all home studio, here are some of my favorites:
Two trestles and a plywood sheet: From the hardware store or this one from Ikea.
A tall phone tripod: I have this one.
A phone tripod for filming/photographing flaylays: I have this one.
A diffuser/reflector to modify the light: I have this one.
Black and white foams: from the dollar store or these ones.
High-quality vinyl backdrops: my favorite brands are this one and this one.
Aprons: Use them as backgrounds while wearing them,or as a small-scale backdrop: I love this brand , this one and this one.
Linens: From your local shop, or try these ones.
A backdrop stand and clamp holder: like this one and this one.
Heavy-duty clamps: These work geat.
To wrap it up
To wrap it up, here’s a summary of what we’ve been talking about:
Find a spot close to the kitchen and by a window to create your temporary set-up.
Choose your surface: plywood sheet, the floor, a side table, a chair…
Get the backdrops: linens, papers, trays, vinyls…
Add some tools for extra creativity: tripods, diffusers, stands...
Have fun experimenting and tag me in your photos so I can see them!
The photos with plywood backgrounds are my favorite. They areSO vibrant and would be perfect for stop motion. Have you done stop motion before?
Great post and information! Thank you!